

This is my attempt to bring a 1973 Series 3 Land Rover 88" SWB back to life that I found in a field about a year and a half ago.
Wednesday, August 24, 2011
update 8-11
Got a message from the new owner saying he's keeping her in good shape and finished the paint. Even at almost 40 she's still a head turner.


Thursday, March 31, 2011
Farewell rover.
After it leaked the last puddle of 90W in the garage, the Rover that landed on Texas shores and stayed on Texas shores back in '73/'74 moved back south to Austin. UNDER ITS OWN POWER. The little train that could.
A couple of people asked if I would get another Rover, the answer is hell yeh.
Fossil rim tour vehicle -Glen Rose, Texas.

On to new projects....
http://jims73commando.blogspot.com/
A couple of people asked if I would get another Rover, the answer is hell yeh.
Fossil rim tour vehicle -Glen Rose, Texas.

NEW NOTE 4-10-13
The Dallas zoo has acquired a couple of series 3 rovers
and they are on display around the lion and cheetah cages.
On to new projects....
http://jims73commando.blogspot.com/
Wednesday, December 8, 2010
1973 Land Rover Series III 2 Door Wagon 4x4 88" Prices, Values & Specs - NADAguides
1973 Land Rover Series III 2 Door Wagon 4x4 88" Prices, Values & Specs - NADAguides
**asking around the low end price $8,000**
1 of 3379 imported before ceasing export the USA by Land Rover.
source: http://www.fourfold.org/LR_FAQ/FAQ.3.LR_sales_US.html
**The top is the original color that I got with it. It won't take much to sand and paint -
just have had a billion, well, not a billion other things going.
** Very straight body, overall in very good condition for a 38 year old vehicle.
**This is a first come, first served contingency.**
I have a extra set of (5) 16" road wheels that go with it. Other parts extra. Just ask.
Features amazing technology like:
Steering wheel and brakes.
5 round tires (32")
3 doors that open AND shut
hazard lights and horn
4wd w/ hi and low range
4 speed with full synchronization
139 cubic inch inline 4 (2.25L) petrol engine
all lights that actually work
front air control flaps in firewall
heater - works even better in august
seating for up to 7 people w/optional center front seat
seatbelts for 6
herculined interior panels and floors for noise dampening
*wash it out with a garden hose- it doesn't care*
solid frame and firewall
fully removeable top. haven't gotten to inner liner yet.
rear step bumper with tow pintle
*Defender door panels* The bling of the vehicle.
front winch bumper (winch extra)
under seat storage
***Drivetrain has been gone through, axle to axle
***engine runs like a top
*you can drive it places, steers great and doesn't beat you to death and wander
all over the place like some jeeps i've owned. you drive it, it doesn't drive you.
*Beyond that it is just preference on what someone wants to do.
*Top comfortable speed is 60, if you want to go faster I would recommend a
roverdrive or fairy od. -about a 3 1/2 hour install- good for 5 to 10 extra mph
at the same rpms.
*For even more off road performance get some parabolic springs( give 2 to 3" lift too)
**asking around the low end price $8,000**
1 of 3379 imported before ceasing export the USA by Land Rover.
source: http://www.fourfold.org/LR_FAQ/FAQ.3.LR_sales_US.html
**The top is the original color that I got with it. It won't take much to sand and paint -
just have had a billion, well, not a billion other things going.
** Very straight body, overall in very good condition for a 38 year old vehicle.
**This is a first come, first served contingency.**
I have a extra set of (5) 16" road wheels that go with it. Other parts extra. Just ask.
Features amazing technology like:
Steering wheel and brakes.
5 round tires (32")
3 doors that open AND shut
hazard lights and horn
4wd w/ hi and low range
4 speed with full synchronization
139 cubic inch inline 4 (2.25L) petrol engine
all lights that actually work
front air control flaps in firewall
heater - works even better in august
seating for up to 7 people w/optional center front seat
seatbelts for 6
herculined interior panels and floors for noise dampening
*wash it out with a garden hose- it doesn't care*
solid frame and firewall
fully removeable top. haven't gotten to inner liner yet.
rear step bumper with tow pintle
*Defender door panels* The bling of the vehicle.
front winch bumper (winch extra)
under seat storage
***Drivetrain has been gone through, axle to axle
***engine runs like a top
*you can drive it places, steers great and doesn't beat you to death and wander
all over the place like some jeeps i've owned. you drive it, it doesn't drive you.
*Beyond that it is just preference on what someone wants to do.
*Top comfortable speed is 60, if you want to go faster I would recommend a
roverdrive or fairy od. -about a 3 1/2 hour install- good for 5 to 10 extra mph
at the same rpms.
*For even more off road performance get some parabolic springs( give 2 to 3" lift too)
Tuesday, December 7, 2010
Problems fixed!
Ok - speedo cable grenaded itself so the squeaking stopped. Cheap and easy fix.
The parts came in for the shift tower thingy. It is a defender type with a pressed steel pin instead of a set screw.
I guess the slop of the old shifter was the reason for a 'notchy' gearbox. This thing shifts like butter now. (cold butter, but butter) There is a BIG e-clip that keeps the shifter spring in along with a lower flat washer and a conical upper washer. 1/2 hour job after paint dries.

I checked the reverse wires for grounding etc.. but could not find a short.

Houston, we have heater. On a 39 degree day there is a warm waft of air that circulates thru the front of the cab before getting sucked out the seal - lacking rear windows.


Thursday, December 2, 2010
small trip into dallas, bad brake switch, cooked wire, shifter, speedo cables
Oh where to begin... shifter set screw came out leaving me stuck in reverse for a while until I could get the shifter into the forks. Just got a new defender style shifter tower with a pressed steel pin to replace it. OOH. AAH.
I had to get a cheapo generic brake switch so I could go on a field trip with my kid into dallas. I built a temporary bracket in the cab for it where the pedal actually contacts the switch. Some of the brass switches are crap (2 went out in three months) so I ordered an ACTUAL land rover switch to the tune of $36. It has more epoxy around the connectors - will see how it works tomorrow.
Lets see what else ... oh yeh , backing out of the garage I noticed a light haze coming from the firewall (bulkhead) area. I shut it off immediately and found the reverse light power wire had cooked off about 3" (75mm) of insulation for whatever reason. It didn't seem to affect anything else- so I put a fuse inline. It kept popping so when replacing the shifter I bet I'll find the problem with the wires. Probably nicked it putting the floor boards back in. Just no reverse lights for now.
And lastly the speedo cable end broke off in the speedo. I got it out and shaved off 1/4" of speedo cable housing. It works again but has a squeak up to 5 mph. It'll probably go away. Or jam up, wrap up all the wiring in the dash and catch fire going down the highway. But that could never happen.
I had to get a cheapo generic brake switch so I could go on a field trip with my kid into dallas. I built a temporary bracket in the cab for it where the pedal actually contacts the switch. Some of the brass switches are crap (2 went out in three months) so I ordered an ACTUAL land rover switch to the tune of $36. It has more epoxy around the connectors - will see how it works tomorrow.
Lets see what else ... oh yeh , backing out of the garage I noticed a light haze coming from the firewall (bulkhead) area. I shut it off immediately and found the reverse light power wire had cooked off about 3" (75mm) of insulation for whatever reason. It didn't seem to affect anything else- so I put a fuse inline. It kept popping so when replacing the shifter I bet I'll find the problem with the wires. Probably nicked it putting the floor boards back in. Just no reverse lights for now.
And lastly the speedo cable end broke off in the speedo. I got it out and shaved off 1/4" of speedo cable housing. It works again but has a squeak up to 5 mph. It'll probably go away. Or jam up, wrap up all the wiring in the dash and catch fire going down the highway. But that could never happen.
Friday, November 19, 2010
Step by step agony V2
Heres why I left a glazings thickness around the outer edge of the window.
I cut 3 glass thickness strips and rounded the front corners
top and bottom and lower rear so the glass is well sealed and protected from
hitting the metal of the frame.

Here it is in the frame

and again....

Press around the edges of the window to smush (technical term) the glazing
into the form of the frame a little. I think a hotter day than 61 degrees would help this process.
Screw down the front bracket to keep it in place.

This is the lower spacer for the window, it is the same piece as on the top of the frame.

The lower weather strip has to have the large oval hole over the window lock.

On the first door I tried re using the original screw holes. Nearly impossible to align
the weather stripping and aluminum spacers and get the same hole. Plus some holes
are stripped out. I found it easier to drill new holes.
I used the wide flat blade screw driver to push the stipping up against the glass while drilling
the new holes. When the screws are put in - the stipping pressed the glass against the glazing
and the glazing against the outer metal.

Step by step agony - or otherwise known as glazing a window. V1
These are the culprits that cause so much greif !
They are
A: tiny
B: stuck down in a rotted weather strip that is full of muck that you cant see
C: usually rusted or corroded to the point that they have no way to unscrew them
A couple would come out - then you have to carefully bend the old weather strip from around the bad ones and get them
with some needle nose pliers or such without hitting glass

After the screws are extracted and the strip pulled , the window will either
A: fall out by itself
B: require a flat blade screwdriver
C: dynamite
Mine required B on one side and C on the other.
Scrape the old glazing with a sharp razor blade.

After scraping - clean the glass throughly. Ooh- Shiny!

Make sure the frame is clean and ready for glass.

I got this at an actual 'fire sale' Half the business burned, this stuff survived on a lower shelf
(remember stop, drop, and roll?) It had soot damage to the top of the box but didn't get hot enough to
melt. It is a sticky- nay, tacky- rubber impregnated with cork.

Layout about an inch more than you need and cut.

Cut the big strip into three equal width strips.

Place the 3 strips on the window (make sure you're doing the correct side)
Heres where I differ a bit- to keep the window from sagging in the Texas heat and
hitting the steel window frame -
Theres a thickness of the glazing hanging over the
edge of the window.

Thursday, November 18, 2010
Deluxe axle holding brackets.
Due to the nature of a rover axle I decided it would be best to have some spares along. Instead of rolling around in the floorboard - I mounted them on emt tubing holders from your local electrical supply store.
They fit perfectly behind the side bench seat!
 Total cost: $3.20 : )
They fit perfectly behind the side bench seat!

Monday, November 15, 2010
rear step bumper
I'm making a rear step bumper to replace the factory folding rear entry step that came on it. It will look like this except it has lower mounting tabs and is narrower- it should help with passenger entry and provide a little - maybe 5mph??- protection for the rear of the rover.


Thursday, October 28, 2010
rock rails!
So- how do you try to save some aluminum (and that gray gas tank that is exposed)? Simple- put some steel in the way.
The last set of rails I made for the full size bronco came in at 55lb per side. That's ok for that lumbering beast with a 460CI. weight doesn't matter.
For 77 hp (peak) (on a good day) I chose to go lighter. I used 10 GA ?? tubing, trimmed and welded it to match the stock lower panels
and then set out to mount it. Other owners used the bulkhead bolt and ran chassis stiffeners or added outriggers.
Mine got a thick piece of bar steel that ran the length of the lower door sill ,and just a little wider, welded to the rail then angle iron welded to the underside of it and to the rail. The original sill mounting plates hold the rear of the rail, and the bulkhead bolt went through a piece of c-channel to hold the front.
It looked like it would work, but for a little extra oomph a piece of 1/4" angle iron was welded under the rail and chamfered. If itbreaks,something went really wrong!


It works!

The last set of rails I made for the full size bronco came in at 55lb per side. That's ok for that lumbering beast with a 460CI. weight doesn't matter.
For 77 hp (peak) (on a good day) I chose to go lighter. I used 10 GA ?? tubing, trimmed and welded it to match the stock lower panels
and then set out to mount it. Other owners used the bulkhead bolt and ran chassis stiffeners or added outriggers.
Mine got a thick piece of bar steel that ran the length of the lower door sill ,and just a little wider, welded to the rail then angle iron welded to the underside of it and to the rail. The original sill mounting plates hold the rear of the rail, and the bulkhead bolt went through a piece of c-channel to hold the front.
It looked like it would work, but for a little extra oomph a piece of 1/4" angle iron was welded under the rail and chamfered. If itbreaks,something went really wrong!
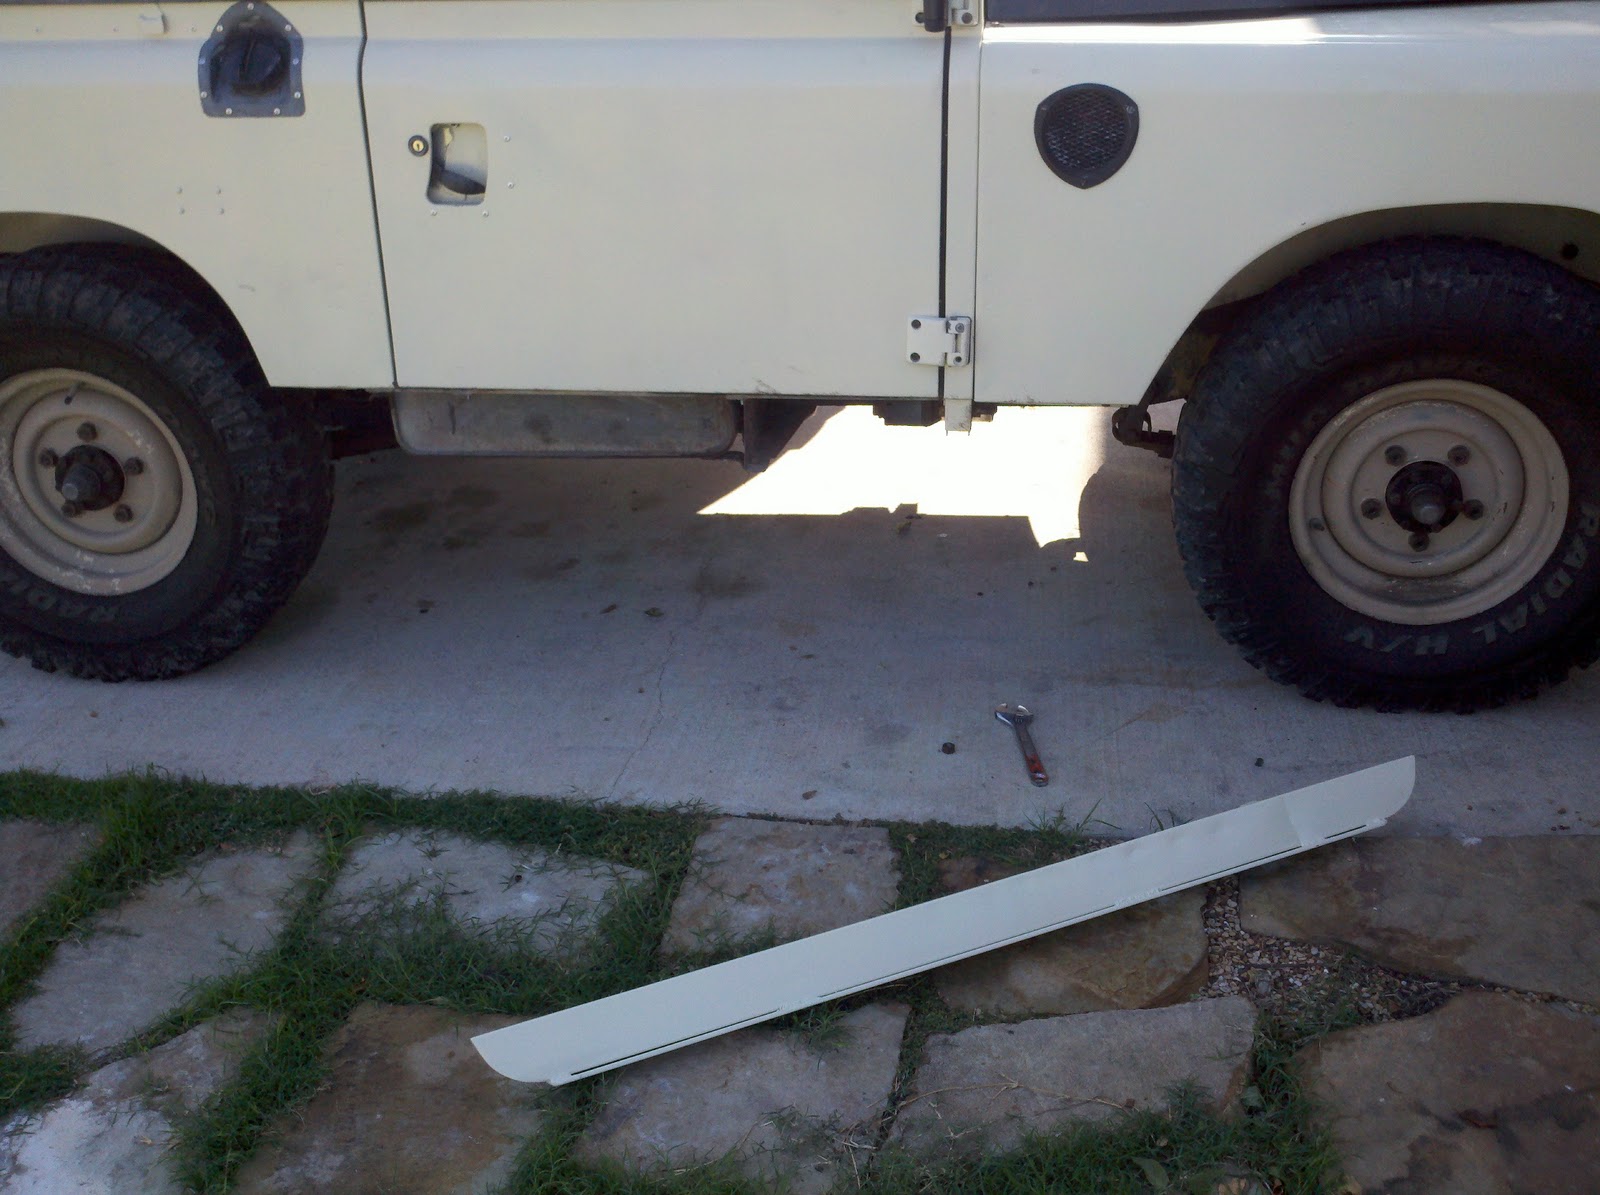
before:

after :)

It works!

It wanted to go higher- but started rolling fore and aft thanks to open pumpkins.
I had to jump up and down on the front bumper to flatten the vehicle down after this!
Wednesday, October 13, 2010
My rover is into leather....
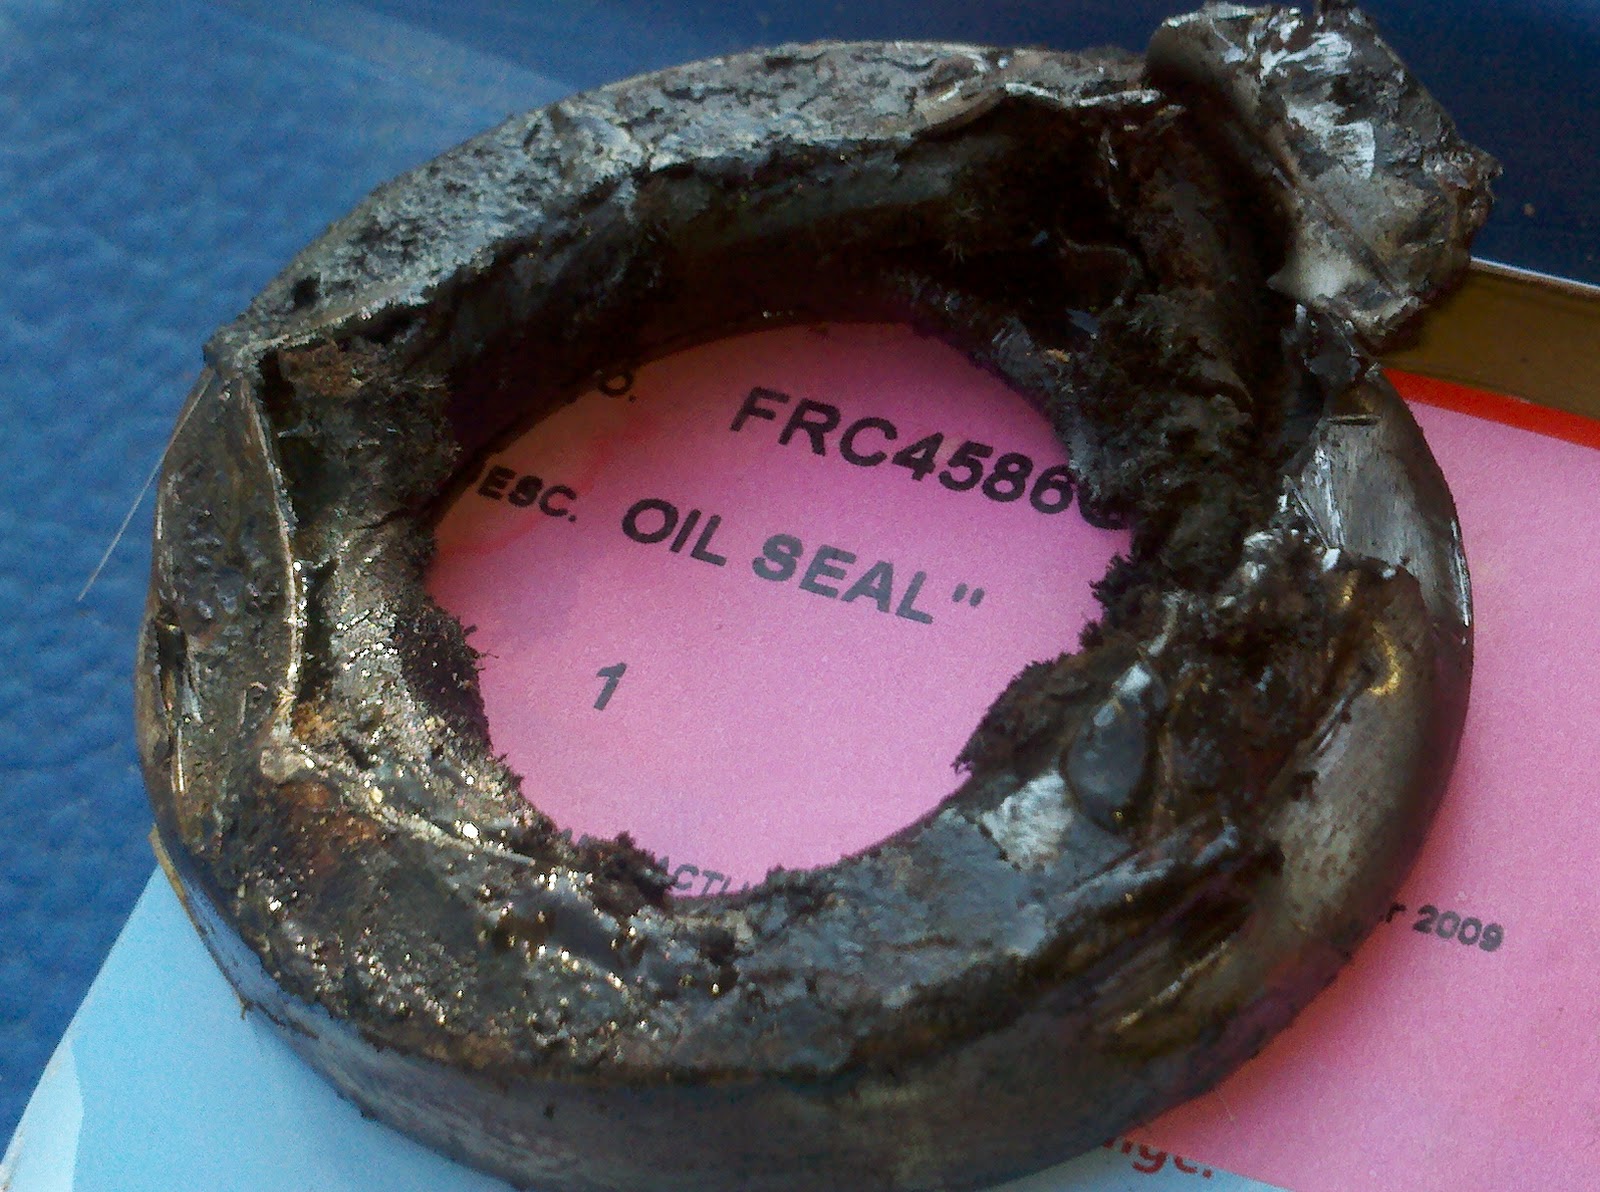
This here's the new pinion seal -poised and ready to stop the gl-4 from pouring out. This is supposed to be a 1/2 hour job with everything going right- well that didn't happen.

Here's the old seal- and thats one dead cow! It's a leather ring stuck in a metal sleeve. This harkens back to the days of leather head gaskets and non greedy oil companies.

Friday, October 8, 2010
Way better!
The hole from the DSPO was cured with some aluminum rivets and thick aluminum plating. It was strong enough that with a LOT of weight pushing down on it there wasn't any signs of popping out. Again all surfaces were sanded & xyloled.
The other little screw holes filled in with the herculiner by themselves, but a couple of 1/4" holes had to be taped from the bottom to keep from draining thru to the underside! *Use a big fan when applying this stuff in an enclosed area to reduce the odors unless you have brain cells to spare.*
 Heres the finished product:
To the left:
 To the right:
 and the rest:
 I can say that except for gearwhine the vehicle is much more liveable and has less drumming going down the road.
The other little screw holes filled in with the herculiner by themselves, but a couple of 1/4" holes had to be taped from the bottom to keep from draining thru to the underside! *Use a big fan when applying this stuff in an enclosed area to reduce the odors unless you have brain cells to spare.*

To the left:


Thursday, September 30, 2010
Tub housekeeping
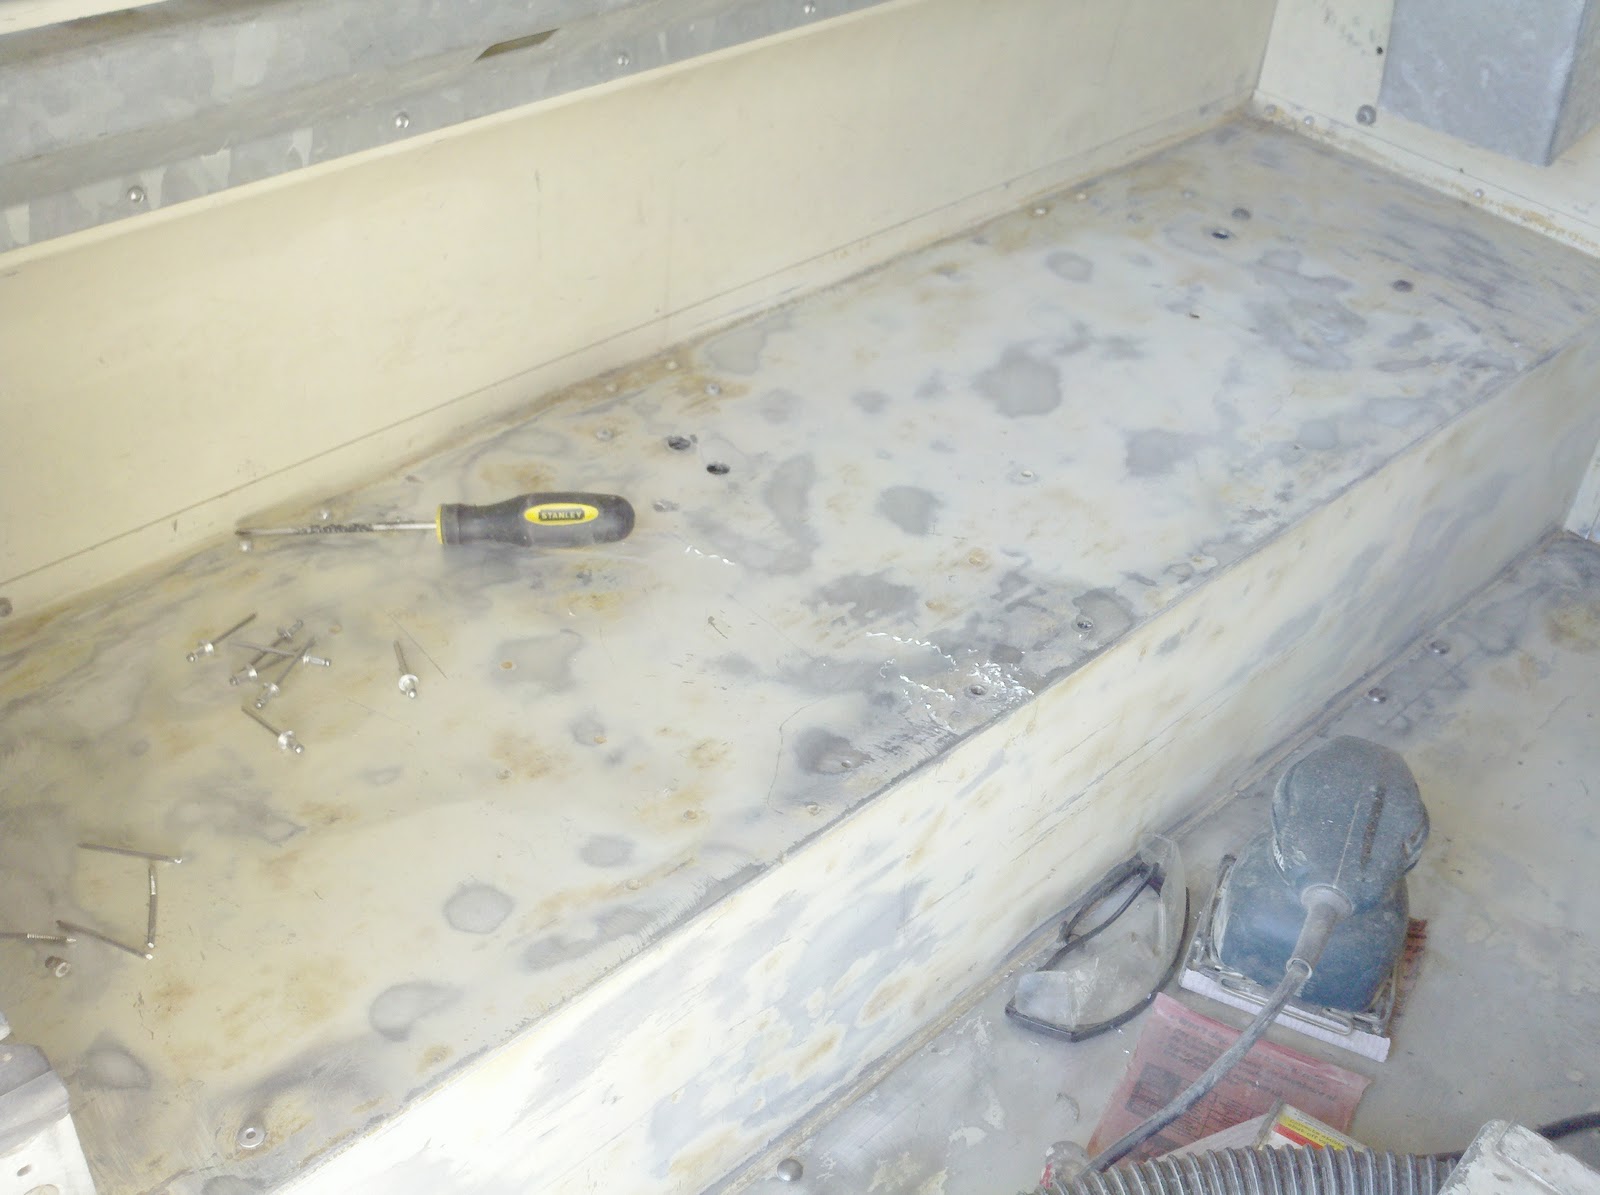
After several drives I noticed that a lot of the noise came from the back of the rover where the aluminum was bare. Its time to clean and herculine the interior. I pulled the galvanized sheet of steel from the front of the tub and found some holes.
I'm guessing the DSPO at hunting camp didn't want to mess with the gas tank so he mounted a gas tank and ?? in the tub. Note the square area.
 Its a little yucky back there. I found a burnt wire coming through the floorboardon the right side of the dirty area.
What it was for? I dunno. The large holes are about 2 x 2.5" and another about 1" diameter. Why? I dunno still.


I'm guessing the DSPO at hunting camp didn't want to mess with the gas tank so he mounted a gas tank and ?? in the tub. Note the square area.

What it was for? I dunno. The large holes are about 2 x 2.5" and another about 1" diameter. Why? I dunno still.

OOH- SHINY!

The seat belt mounting bolts finally gave up and came out. They were harder to get out on the left side than the right side for some reason. The rivets are bad bad bad. I'm rying to preserve the wiring by missing them with the grinder :)

A couple tub side supports came loose when removing the bolts. The rivets corroded into and the brackets are loose. I'm getting new rivets put in so the seatbelts can mount securely. Even if they are never used.
Thursday, September 2, 2010
Little trips and problems
Need to tighten alternator bracket.
Brake switch seems to be a Rover only part. It went phlewy and stopped working. Shocker.
Oreillys dug through 3 huge books and came up with something that 'might' work for $13.
So I just ordered another at the 'great' price of $16. Hope it lasts longer. If not the brake lights will get LEDs put in to reduce the load.
The switches riveted on terminals were loose, and the plastic piece spun inside the casing. Sometimes it would make a click sound,
sometimes not. Regardless, a new switch is cheap insurance.
I need to get on with the body armor portion of the build as fall is approaching and Gilmer, TX calls. Now that I have more confidence in the mule, it needs to go on more outings.
Brake switch seems to be a Rover only part. It went phlewy and stopped working. Shocker.
Oreillys dug through 3 huge books and came up with something that 'might' work for $13.
So I just ordered another at the 'great' price of $16. Hope it lasts longer. If not the brake lights will get LEDs put in to reduce the load.
The switches riveted on terminals were loose, and the plastic piece spun inside the casing. Sometimes it would make a click sound,
sometimes not. Regardless, a new switch is cheap insurance.
I need to get on with the body armor portion of the build as fall is approaching and Gilmer, TX calls. Now that I have more confidence in the mule, it needs to go on more outings.
Friday, August 27, 2010
history
It turns out that mine was one of only a scant few limestone colored vehicles arriving in TX
About 5 total that I saw. About half way down under the bar.
http://www.lrfaq.org/Series/FAQ.S.chassis_numbering.259.html
line 1086
About 5 total that I saw. About half way down under the bar.
http://www.lrfaq.org/Series/FAQ.S.chassis_numbering.259.html
line 1086
Oh yeah- it drives.
I pulled out on the street and headed for a gas station.
Since there hasn't been a full tank of gas ran through, and I'm not sure of the fuel guage yet, I filled to the screen in the fuel neck.
Pulled out on the interstate- @ '50' mph shes got a lot of gear whine, but is tracking true and can
do '55'. Newer cars aren't passing as fast as I thought they would. The odometer is relatively close to the mileage markers so its only a couple miles off... or so I thought.
It seems '50' is actually '60' and I was probably up to 65 w/o an overdrive for a short while.
The speedo seems to get more off the faster it goes.
A couple of slowpokes in the slow lane (if there is such a thing in TX) got passed by a 37 y/o vehicle even! About 40ish miles later I pulled into a gas station and filled the tank back to the screen.
It got 13.7 mpg with a big azz rochester on it in a square box doing '60'!!
Typical leaks - I call it 'marking its spot' - after parking. For all the rattles and gear whine though it made it without incident.
Life is good.
Since there hasn't been a full tank of gas ran through, and I'm not sure of the fuel guage yet, I filled to the screen in the fuel neck.
Pulled out on the interstate- @ '50' mph shes got a lot of gear whine, but is tracking true and can
do '55'. Newer cars aren't passing as fast as I thought they would. The odometer is relatively close to the mileage markers so its only a couple miles off... or so I thought.
It seems '50' is actually '60' and I was probably up to 65 w/o an overdrive for a short while.
The speedo seems to get more off the faster it goes.
A couple of slowpokes in the slow lane (if there is such a thing in TX) got passed by a 37 y/o vehicle even! About 40ish miles later I pulled into a gas station and filled the tank back to the screen.
It got 13.7 mpg with a big azz rochester on it in a square box doing '60'!!
Typical leaks - I call it 'marking its spot' - after parking. For all the rattles and gear whine though it made it without incident.
Life is good.
Saturday, August 21, 2010
Better Black Bumper
I got around to taking off the winch and front bumper to paint and mount them better. (I'll actually bolt it on this time) Got some 5 ton tow rings welded on top too.
Low gloss black looks pretty sweet.

Low gloss black looks pretty sweet.
Realized the winch has less oil in it than the rover does- gotta fill it up and reseal it. I don't know how old the winch is, AFAIK its been on a blazer (previous owner), small cherokee, FSbronco, & a willys cj2a. It does have the relays mounted externally, which makes it post 1973. Coincidence? I think not.
Before:
After:

Thursday, August 19, 2010
Horns.
No- I'm not going to make a joke with that word.
The original low monotone horn was sad- meaning that when the engine was running you could barely hear it from in cab.
I acquired a set of hi/ low horns for the grand total of $7.50 from harbor freight. They are blingy chromed plastic and came with a relay and "instructions" to hook them up. Instructions is in quotes due to the lack of english speaking translators making the sheet. i.e. 'fit wire overon slot to make grounding happen.'
yeh.
Anyway the supplied relay didn't work so that was replaced with a spare.
The original horn wires went to the sides of the relay, battery power off of the thermal fuse that supplies my headlight relays and the sending wire to both power terminals. These horns had dual power terminals so the others were grounded to the mounts.
I don't know how long these will last- but these puppies are LOUD! Enough to scare the ricers.

The original low monotone horn was sad- meaning that when the engine was running you could barely hear it from in cab.
I acquired a set of hi/ low horns for the grand total of $7.50 from harbor freight. They are blingy chromed plastic and came with a relay and "instructions" to hook them up. Instructions is in quotes due to the lack of english speaking translators making the sheet. i.e. 'fit wire overon slot to make grounding happen.'
yeh.
Anyway the supplied relay didn't work so that was replaced with a spare.
The original horn wires went to the sides of the relay, battery power off of the thermal fuse that supplies my headlight relays and the sending wire to both power terminals. These horns had dual power terminals so the others were grounded to the mounts.
I don't know how long these will last- but these puppies are LOUD! Enough to scare the ricers.

Friday, August 6, 2010
I got gas- in the rover

I finally drove the rover UNDER ITS OWN POWER to the gas (petrol) station today. The state trooper *thankfully* didn't look twice at it. After getting the voltage stabilizer installed the gas gauge moved from full bottomed out to mid E on about 2 gallons of gas.
I had to jump start it, I beleive that the power cable to the starter wasn't tightened enough.
It accelerated pretty good, but with 32 x 11.5 15s it had to get to top gear pretty quick. I filled up the rest of the way with 9.7 gallons. This gives me 3/4 tank. Now I need to bend the tank float to make it full. I noticed that the speedo wasn't working. Pulled the guage cluster, plugged in the speedo cable that I forgot, and checked everything. A quick trip around the drive and the speedo works, the odometer is in question of how accurate it is, but hey- it does work.
Wednesday, July 21, 2010
A throttle in the hand is worth two in the bush
It arrived in really good condition, 3 bolts to hook it up to the bulkhead. Even after washing gunk off of it- it smells like an old tractor.

Heres where it comes out behind the exhaust:

I ended up getting the cut off linkage from merry old England:

Heres how long it needs to be:
NOTE: for my wife that says to get rid of the crap in the garage- I kept this piece of axle off of a power wheels for 5 years just for this. It was its destiny.

And... completed.

Safety note: Check your linkages and make sure they open and close fully. At first mine would not fully close thus revving the piss out of the engine. Then after a couple of adjustments to the stock bellcrank with the clockspring, it worked good.

Heres where it comes out behind the exhaust:

I ended up getting the cut off linkage from merry old England:

Heres how long it needs to be:
NOTE: for my wife that says to get rid of the crap in the garage- I kept this piece of axle off of a power wheels for 5 years just for this. It was its destiny.

And... completed.

Safety note: Check your linkages and make sure they open and close fully. At first mine would not fully close thus revving the piss out of the engine. Then after a couple of adjustments to the stock bellcrank with the clockspring, it worked good.
Subscribe to:
Posts (Atom)